
A DIY project at home relies on three technical pillars: the choice of substrate, the compatibility of materials, and the mastery of the appropriate tool. Neglecting any one of these three elements is enough to turn a simple repair into an expensive redo. The tips and advice that follow are based on this logic to structure each step, from the initial diagnosis to the finishing touches.
Substrate-material compatibility: the technical foundation of home DIY
Most failures in home DIY do not stem from a bad action, but from a poor combination between the existing substrate and the applied material. Drilling drywall with a concrete bit, gluing wood onto greasy tiles without prior sanding, applying acrylic paint on unprimed metal: each combination has its rules.
Further reading : How to Embrace Eco-Friendly and Sustainable Renovation for Your Home Starting Today
Before buying anything, identify the exact nature of your substrate. Solid wood, medium-density fiberboard (MDF), drywall (BA13), aerated concrete, and tiles do not react the same way to fasteners, adhesives, and coatings. A screwdriver and a simple hardness test are enough to distinguish these substrates.
For your painting projects, the primer directly depends on the substrate. On new drywall, a white bonding primer prevents the cardboard from absorbing the color unevenly. On raw wood, a pore-filling primer stops the resin from bleeding through. On a previously painted wall in good condition, a light sanding with 120-grit paper and dusting often replaces a complete primer.
See also : News, tips, and advice for enjoying retirement and aging well
Consulting the Concept Maison DIY guide allows for quick identification of suitable substrate-material combinations for each type of common work.
DIY tools: building a coherent rather than exhaustive toolkit
Accumulating tools does not make you more efficient. It’s better to have a decent-quality drill-driver than a collection of low-quality gadgets stored in a drawer.
The basic toolkit consists of about ten tools:
- A cordless drill-driver with a set of Phillips and flat bits, and a set of drill bits (wood, metal, concrete) suitable for home substrates.
- A rigid tape measure, a compact spirit level, and a carpenter’s pencil: these three marking tools prevent most positioning errors.
- A hand saw (universal teeth) for cutting wood and drywall, complemented by a retractable blade cutter for precision work.
- A set of screwdrivers (flat and Phillips, common sizes), a slip-joint pliers, and a claw hammer.
Each tool has a range of use. A standard drill-driver is suitable for screwing into wood and drywall, but it reaches its limits on reinforced concrete, which requires a hammer drill. Knowing this limit before starting avoids straining the tool and damaging the substrate.
Tool maintenance between projects
A clean tool lasts longer and works better. After each use, remove dust from the ventilation grilles of the drill. Wipe the saw blades with a lightly oiled cloth. Store the bits in a closed case to avoid moisture and rust.
Dull blades increase effort and degrade the cut. Replacing a cutter or saw blade is inexpensive and radically changes the result.
DIY projects in micro-steps: the method that limits errors
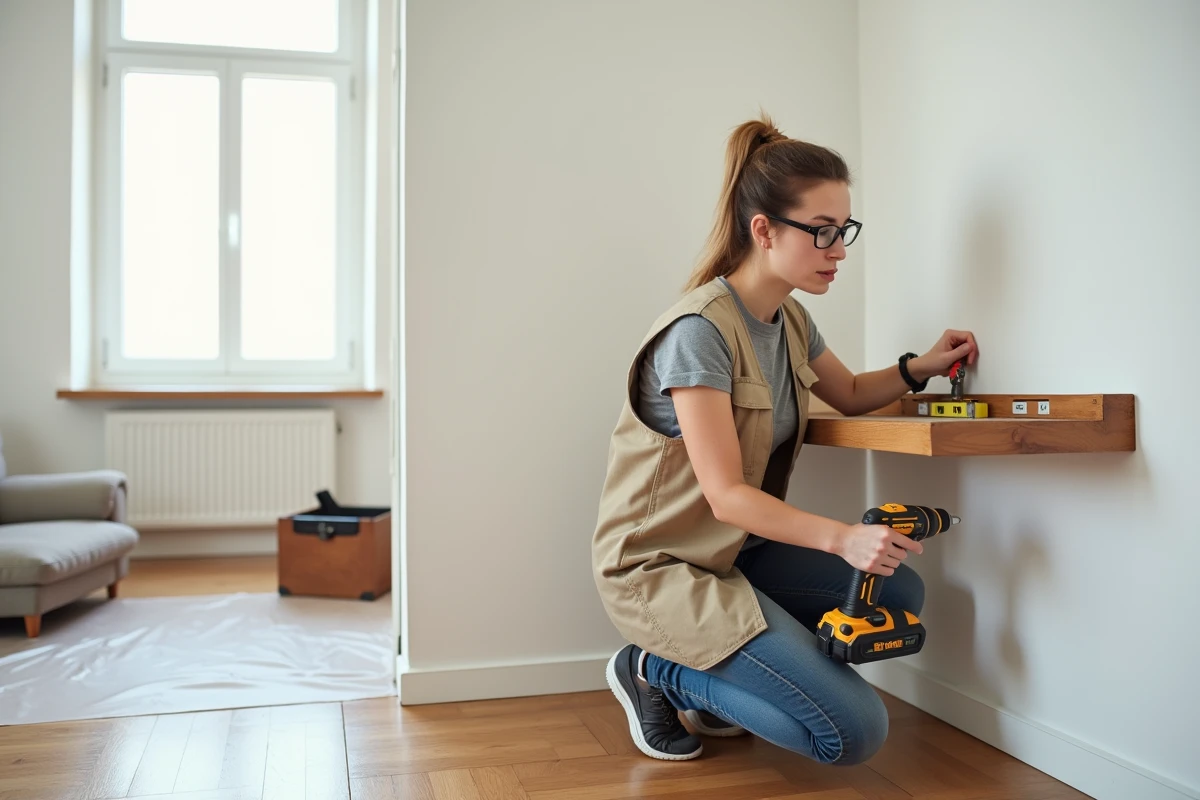
Breaking a project down into micro-steps reduces the risk of error at each phase. A wall storage setup, for example, breaks down as follows: locating the studs (or suitable anchors for the substrate), marking level, drilling, fixing the supports, and then installing the shelf.
Each step is verified before moving on to the next. After marking, step back two meters and check the alignment visually. After drilling, test the anchor by hand before screwing. Correcting a marking takes thirty seconds, while filling a misplaced hole takes much longer.
This step-by-step progression also works for painting. Preparing the substrate (washing, sanding, dusting) constitutes a separate step. Applying the primer is another. The finishing coat comes only after the previous one has completely dried. Skipping a step, such as painting over a wet primer, causes blisters or poor coverage.

Knowing when to stop DIYing and call in a professional
Not all projects fall under home DIY. The line between accessible work and technical intervention often lies in safety and regulations.
Any intervention on the electrical circuit beyond replacing a switch requires standardized skills. Plumbing work that involves drainage or hot water supply presents a risk of water damage in case of a faulty connection. Structural modifications (opening a load-bearing wall, floor reinforcement) require prior assessment.
A good indicator: if the project requires you to buy a tool that you will only use once and that costs more than hiring a professional, delegating becomes the rational option. Similarly, if you are unsure about the nature of the substrate or the technique to use after research, the risk of a redo often outweighs the savings made.
Assessing difficulty before starting
Ask yourself three questions before each project: is the substrate clearly identified, is the appropriate tool available, and is the technique mastered or clearly documented? If any of the three answers is negative, it’s better to deepen the preparation than to compensate with good intentions.
Home DIY progresses through the accumulation of successful experiences on projects within your reach. Each well-placed fastener, each clean cut, and each even coat of paint builds a transferable skill for the next project. The only truly costly mistake is the one repeated without understanding why the first attempt failed.